8.4 KiB
Image taken from Eclipse website
Eclipse is a general purpose IDE, which was initially developed for Java but has evolved to be used for C/C++ as well. It is the recommended IDE to develop Software with the FSFW because it is cross-platform, provides useful features like an indexer and can be configured with moderate effort to use the Make and CMake build systems.
Setting up Eclipse - General
Eclipse project files and launch configurations were provided to have a starting point for application development with Eclipse. It is recommended to use those files and delete unneeded run configurations manually. There are separate project files to either use the Makefiles or CMake.
-
Install Eclipse for C/C++ using the installer. Install the Eclipse MCU plugin for the STM32 and Raspberry Pi example by going to Help → Eclipse Marketplace and searching and installing the plugin
-
For the STM32, the ARM toolchain (and Windows Build Tools on Windows) should have been installed previously. Go to Window → Preferences → MCU → Global ARM Toolchain and Windows Build Tools. Packages installed with xpm should be recognized automatically.
-
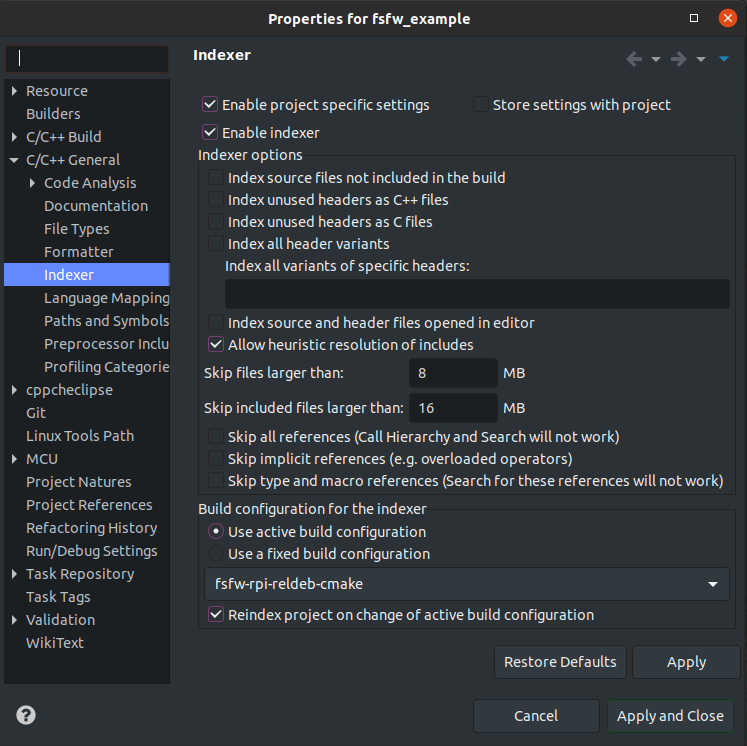
Setting up the indexer: It is recommended to use the separate indexers for each run configurations. Right click on the project folder in the tree view, go to Properties → C/C++ General → Indexer and set the indexer as shown below.
-
Cross-Compiling: In general, the provided project configurations should set up the cross compiler properly. However, if there are issues, the user should check whether the compilers are set up properly.
Right click on the project folder in the tree view, go to Properties → C/C++ Build → Tool Chain Editor and set the correct editor. Then go to Properties → C/C++ Build → Settings and check whether the cross-compiler paths are correct.
Setting up Eclipse for a hosted CMake projects
-
Copy the files
.projectand.cprojectinside the misc/eclipse/make folder into the root of the cloned folder. This will add all build configurations.cd fsfw_example cp misc/eclipse/cmake/.project . cp misc/eclipse/cmake/.cproject . -
Import the project now by going to File → Import → Existing Projects and selecting the cloned folder. Only check the root folder, Eclipse will try to import every folder which contains
.projector.cprojectfiles!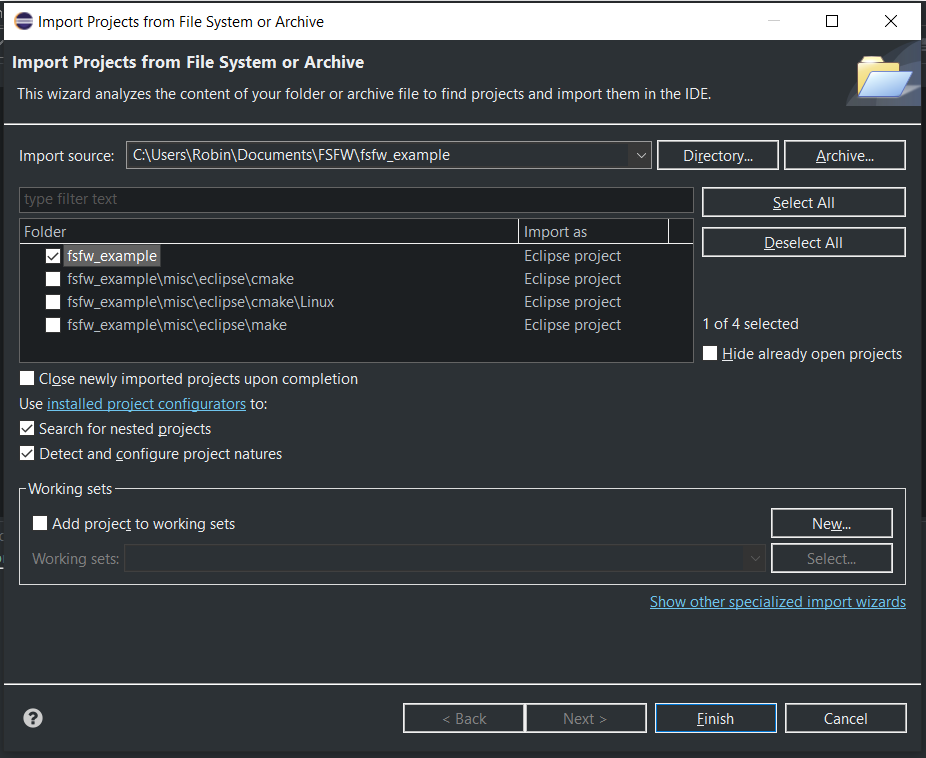
-
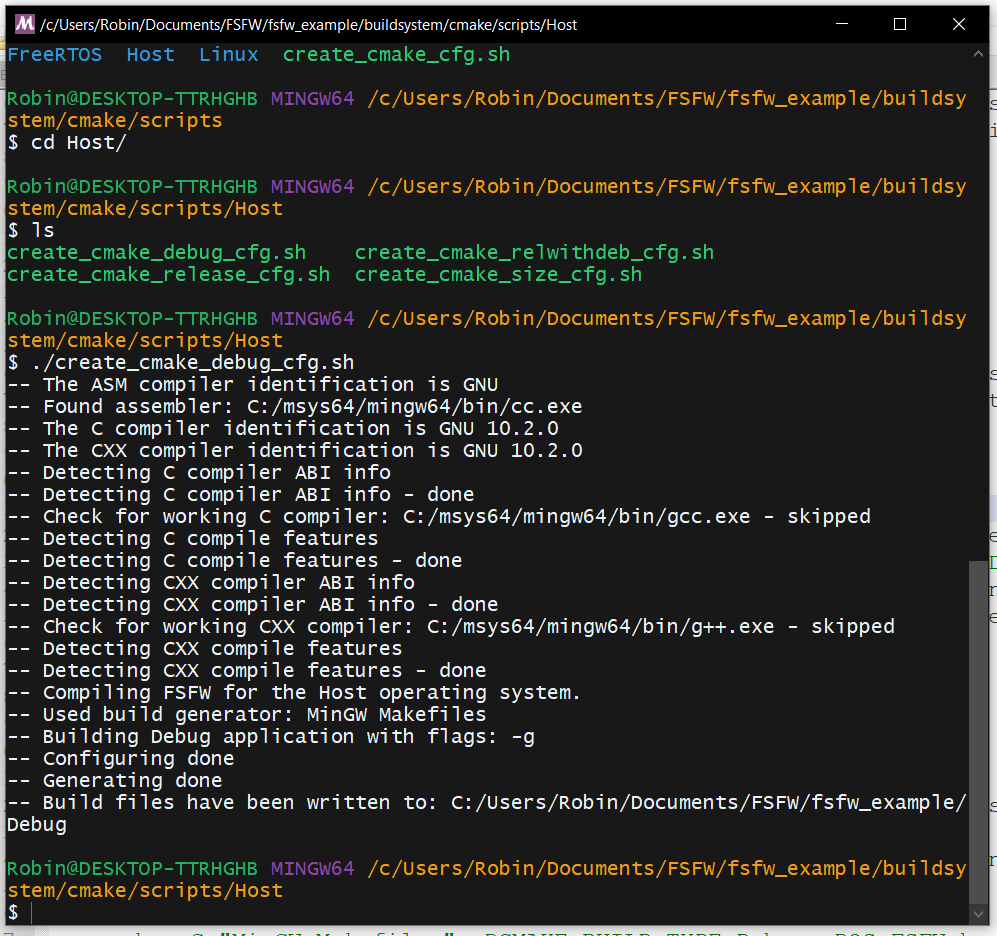
Set up the build folders. Helper scripts have been provided to perform this task and have a starting point, but a valid Python 3 installation is required for them to work. For example, to create the build folder
Debugand build the software with the FSFW Host OSAL on Windows or Linux, perform the following steps in the MinGW64 command line or Linux terminal after navigating into the cloned example folder:cd buildsystem/cmake/scripts/Host ./create_cmake_debug_cfg.shThe shell script can also be run by double clicking it in Windows as long as it is executed by the MinGW terminal. This shell script will first create a new Debug folder (and delete the old one) and then execute the following command in the build folder on Windows
cmake -G "MinGW Makefiles" -DCMAKE_BUILD_TYPE=Debug -DOS_FSFW=hostor the following command on Linux:
cmake -G "Unix Makefiles" -DCMAKE_BUILD_TYPE=Debug -DOS_FSFW=hostFor example, the execution of the script in MinGW64 on Windows should show the following output:
-
The build system is now ready to be used in Eclipse. Select the
fsfw-mingw-debug-cmake(Windows) orfsfw-linux-debug-cmake(Linux) launch configuration in Eclipse and press the hammer button to build the software or the bug button to debug the software for a host machine. This will invokecmake --build . -jin the respective build folders to build the software.
Seting up Eclipse for Raspberry Pi projects - Remote Application
Eclipse is configured to assume that the toolchain is located in /opt/cross-pi-gcc/bin and
will deduce settings and compiler specs automatically (e.g. for the indexer) if the provides build
and launch configurations are used. Adapt the toolchain path accordingly if is installed
somewhere else.
Follow steps one and two of the previous section.
-
Set up the run configuration properly by setting up a SSH connection with your Raspberry Pi. Go to Run → Debug Configurations.., look for the
C/C++ Remote Applicationsection and click on one of the configurations provided for the Raspberry Pi. A new SSH connection should be set up here. The following image shows an example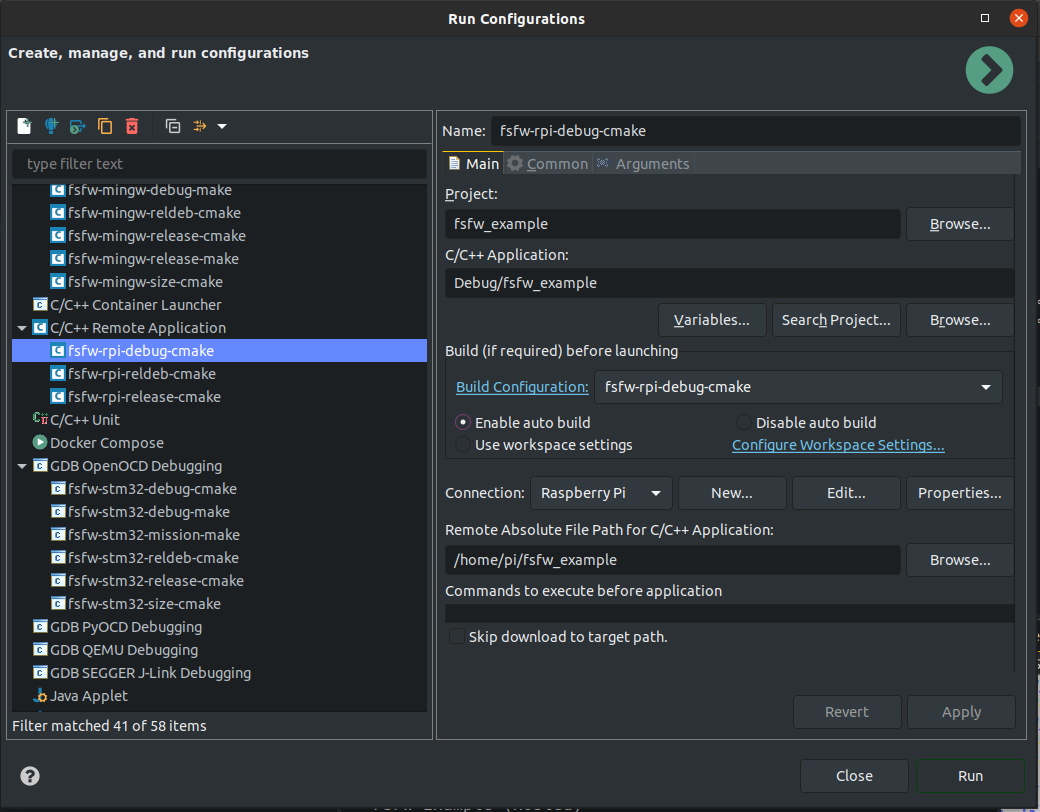
-
Set up the build folders if this was not done already. We are going to do this with the script
cd buildsystem/cmake/scripts/RPi ./create_cmake_debug_cfg.sh -
The build system is now ready to be used in Eclipse. Select the
fsfw-rpi-debug-cmakelaunch configuration and press the run or debug button in the top panel on the right side to run or debug the application. If there are issues, ensure that the Launch Configuration uses the correct SSH settings to connect to the Raspberry Pi.
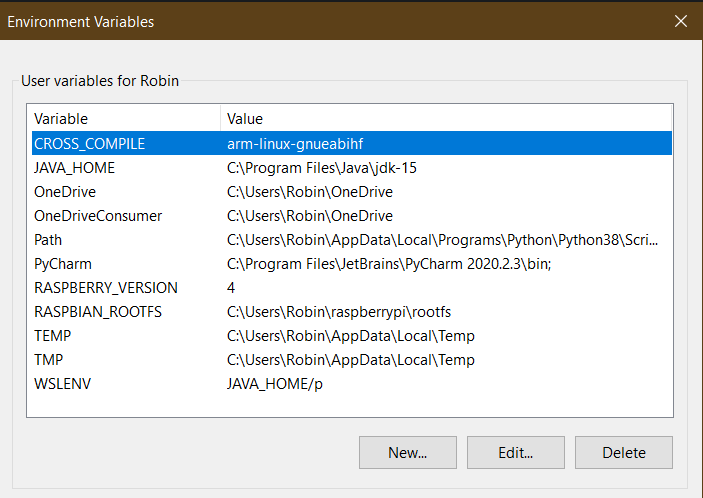
On Windows, MinGW Makefiles are used for the cross-compilation process, but Eclipse will only
have the Windows environmental variables cached. This can lead to issues with the CMake build if it
is configured in MinGW64. It is recommended to add the RASPBIAN_ROOTFS and the RASPBERRY_VERSION
variable to the Windows environmental variables.
The following picture shows an example:
Alternatively, you can also add them to the Eclipse environmental variables in Properties → C/C++ Build → Environment
Setting up Eclipse for Raspberry Pi projects - TCF agent
Alternatively, the TCF agent can be used as a more generic and powerful tool to perform remote debugging.
-
Install the TCF agent plugin in Eclipse from the releases. Go to Help → Install New Software and use the download page, for example https://download.eclipse.org/tools/tcf/releases/1.6/1.6.2/ to search for the plugin and install it.
-
Go to Window → Perspective → Open Perspective and open the Target Explorer Perspective. Here, the Raspberry Pi should show up if the TCF agent has been set up on the Raspberry Pi as specified here or in the respective README. Connect to it.
-
Create a new TCF Remote Application. No launch configuration has been provided because the IP address can change regularly.
-
Create a new the configuration by pressing the cogs button at the top or going to Run → Debug Configurations → Remote Application and creating a new one there.
-
Select the TCF connection, the correct image in the main tab (it might be necessary to send it the the Raspberry Pi manually once) and file transfer properties
-
It is also recommended to link the correct Eclipse project.
After that, comfortable remote debugging should be possible with the Debug button.
Setting up Eclipse for the Makefile projects
The Makefiles are not maintained anymore and it is recommended to use the CMake build configurations instead.
-
Copy the files
.projectand.cprojectinside the misc/eclipse/make folder into the root of the cloned folder. This will add all build configurations. Configurations which are not required can be deleted manually.cd fsfw_example cp misc/eclipse/make/.project . cp misc/eclipse/make/.cproject . -
Import the project now by going to File → Import → Existing Projects and selecting the cloned folder.
-
It should now be possible to build and debug the program by selecting the correct launch configuration in the top panel and hitting the hammer or debug button.